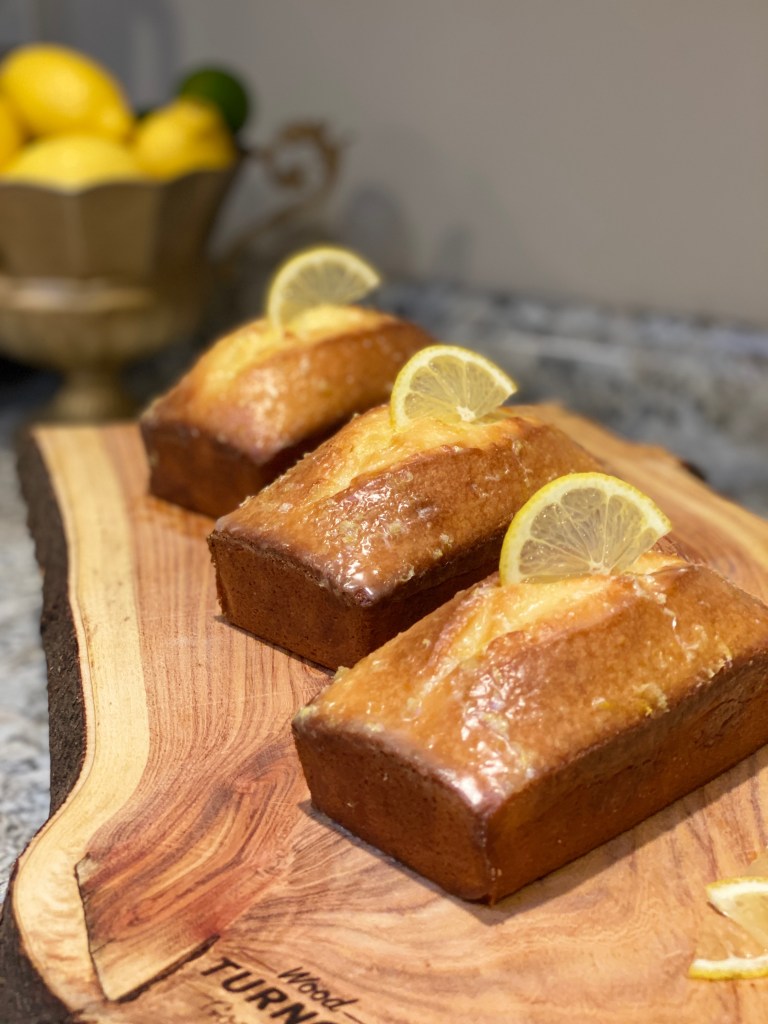
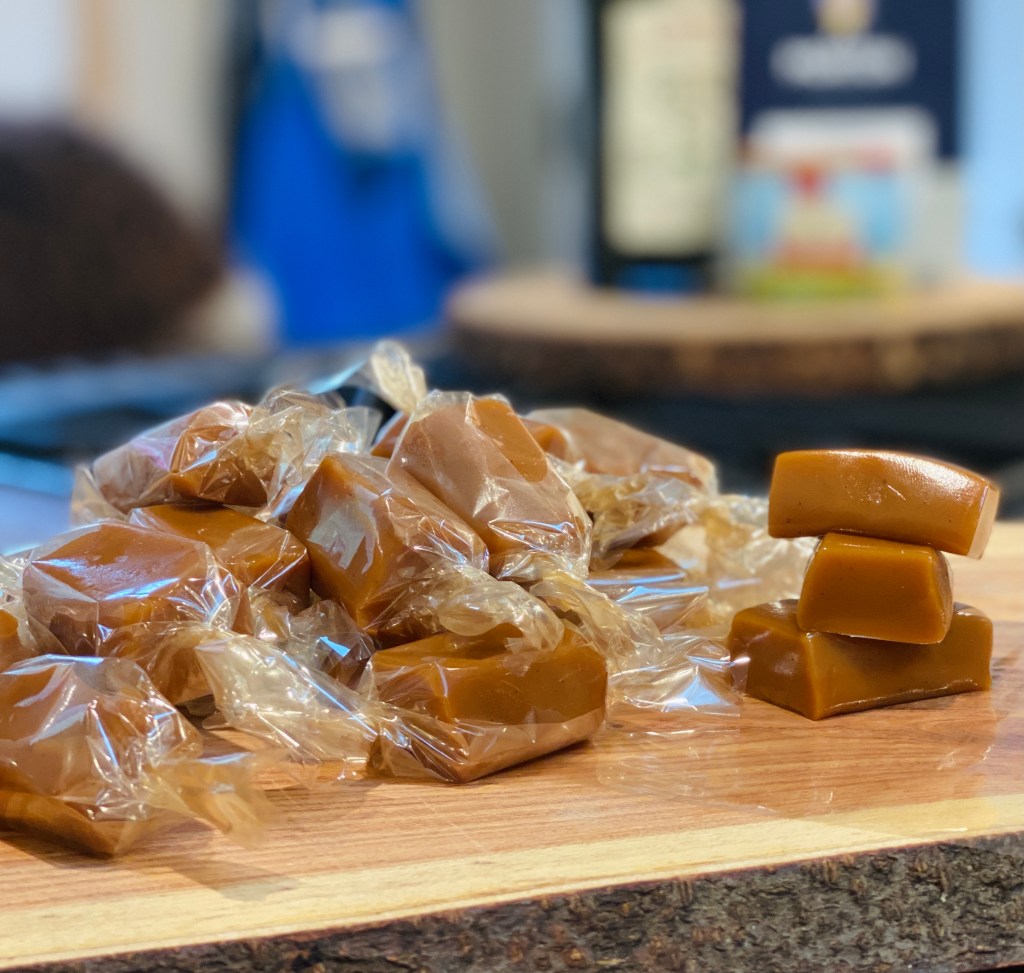
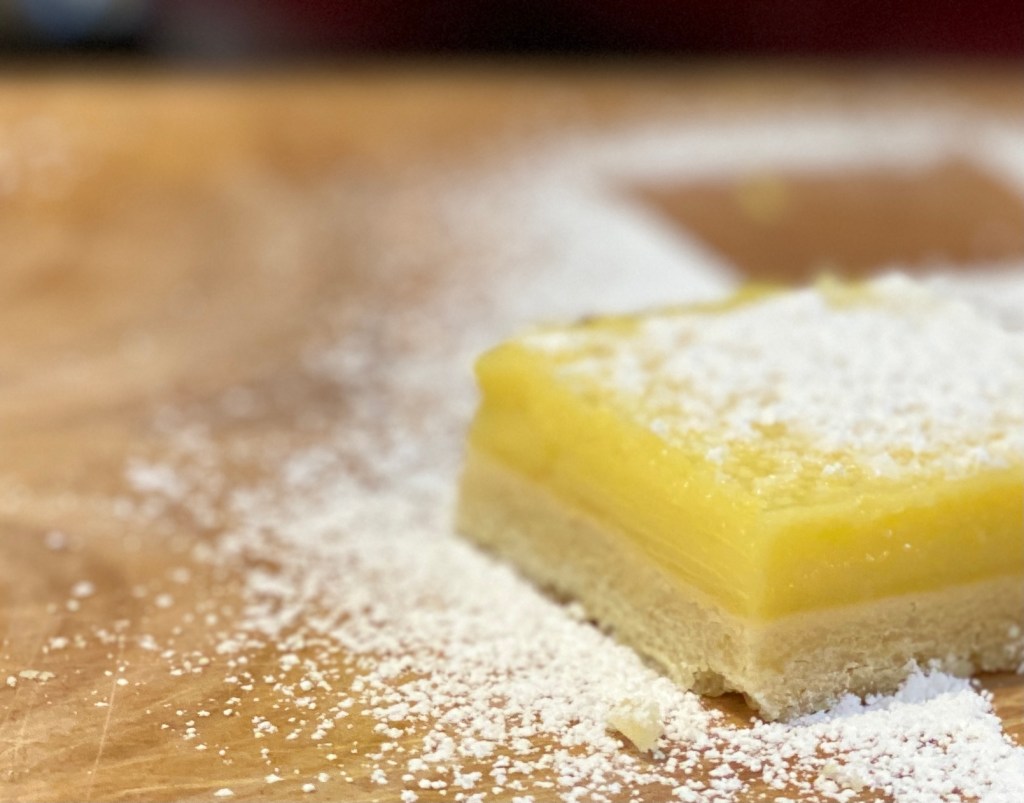
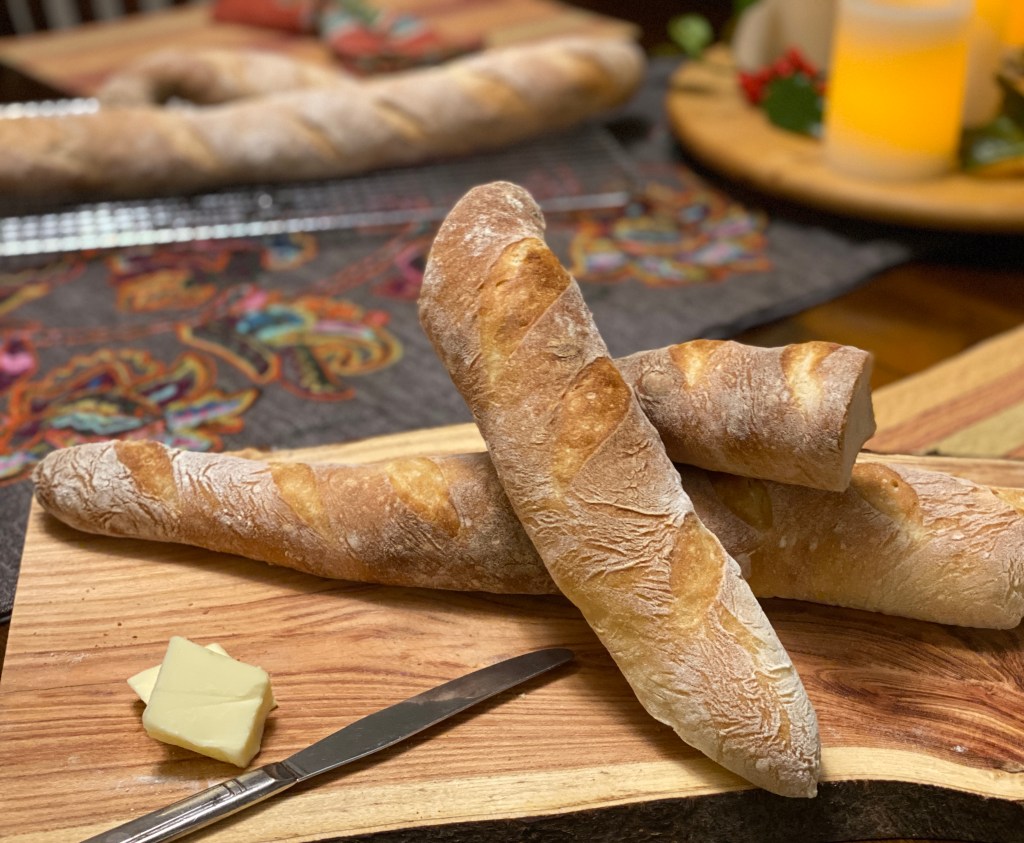
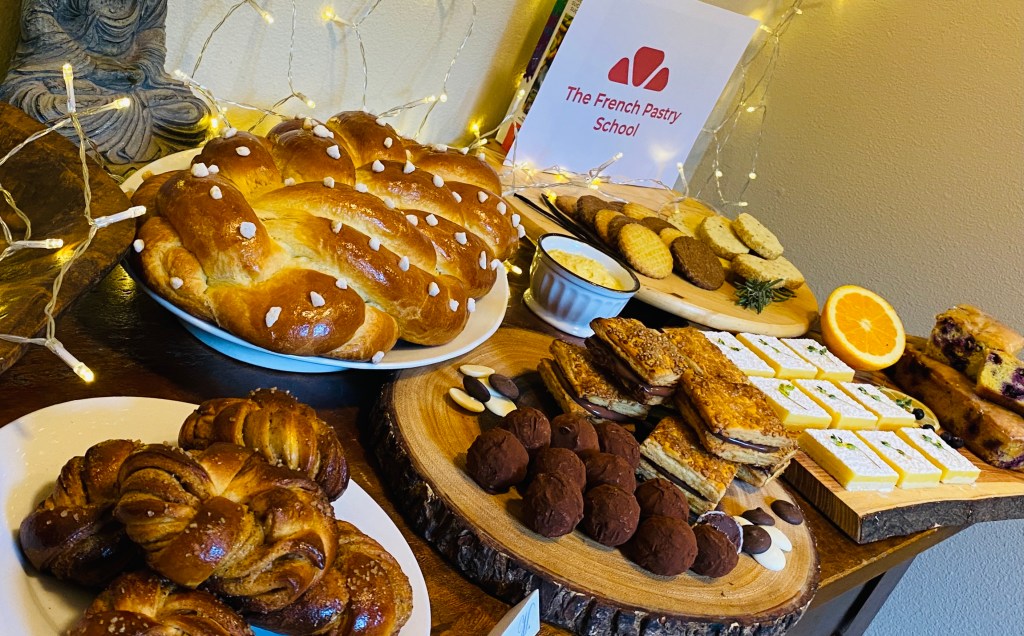
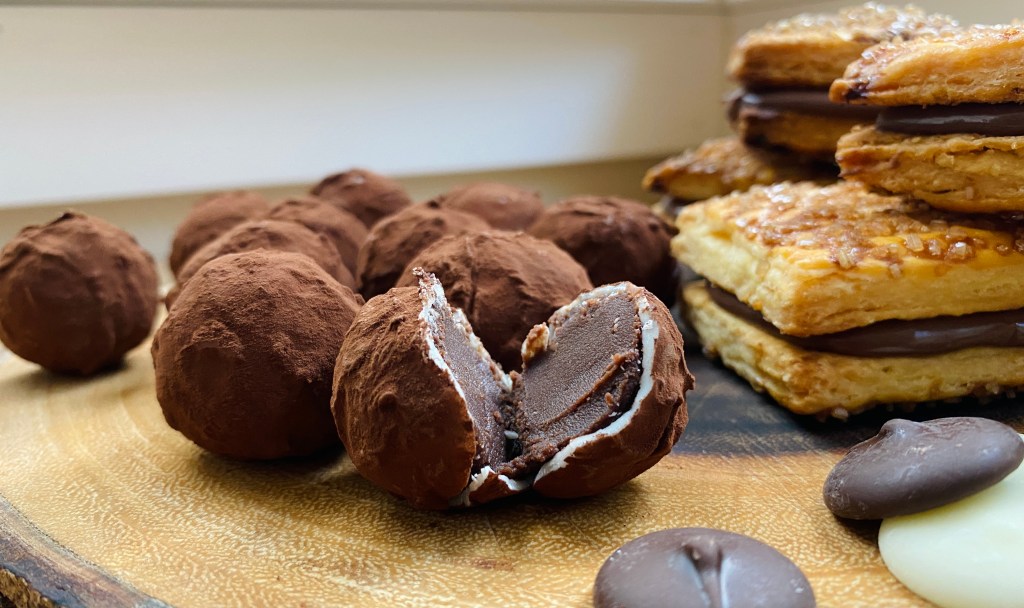
Friday Food Find: The Spiralizer!

If you have not heard of this little gadget, I am here to spread the word! The spiralizer takes a multitude of vegetables and turns them into pasta, chips, or shoe-string frittes. You can also use this tool to transform fruit into chips, salad, garnishes, ribbons, and more. The only limits are your imagination. My first attempt at using the spiralizer was a fresh zucchini and pea salad that was dressed with mint, lemon zest, red pepper flakes, and olive oil that I had to submit as an assignment in my online cookery school, It tasted like spring in a bowl.

salad1

I have been using it ever since on softer fruit and veg. But I was finding it difficult to use on harder veg. But I really wanted to use it to make sweet potato spaghetti. I decided to try par baking the sweet potato. It turns out that fiber just gets too stringy and you end up with a big sticky mess.

20150306_164829684_iOS

I realize now that if I had put some thought in to it, I would have realized this was going to happen. I also tried par boiling with even worse success. So in a last-ditch effort, I tried spiralizing the hard, raw veg followed by a short bath in some boiling water. SUCCESS! While it was difficult to turn the crank, it did work, and looked amazing.

On a side note, I am now in search of a spiralizer that is similar to a pasta maker that you can secure to the counter top and is made of metal. I have yet to find, so if you are some inventor-type, please make a prototype and use kickstarter to make your millions. And as a thank you, all you have to do is sell me one at wholesale for this grand idea!

20150322_002508653_iOS

It tasted really good raw, as I have found with all of the veg so far. But I now needed to test out a few batches to see how long it would need to cook to be used as a pasta in a dish I had swimming around in my head. After three attempts, I found what worked best. I submerged the shockingly bright tendrils in boiling water for exactly one minute before draining.

Next week, I will post the results of this along with an easy peasy dinner recipe that costs almost nothing to make, but looks and tastes amazing (and post a link here once I have it)! In the meantime, I highly suggest that you go out and get one of these! If you can not find one in your local shop,  here is a handy link to one online through Amazon. And that is not all, while I was looking for a link to this gadget, I also ran across this book that got really good reviews. I have have not read it, but have added it to my wish list!

The Motherload!

20150331_021946204_iOS

I am not exactly sure why, but many comfort foods out there have cheese or tomato sauce–or both. This is an issue for me as I am not a big fan of either. In fact, I really only eat smoked cheese. As for tomato sauce, I rarely use it and when I do, it is used rather conservatively. The thing is, I still like comfort food, so I lean towards the meat and potatoes side such as hearty Irish stew, braised short ribs over vegetable gravy, or a simple meatloaf over a bed of mashed potatoes adorned with sweet, vibrant carrots. And when I have not thought ahead but still need a reassuring meal, the latter is a perfect option.

Over the years, I have tweaked, adjusted, and morphed my meatloaf into what is lovingly called meatload in my house. This is not your mother’s meatloaf, nor my mum’s for that matter. It is a dense, almost-terrine like version of the original that packs a herbaceous punch with a smoky backbone. I have also rebranded mashed potatoes for my family’s taste with a few key ingredients: rosemary and white chocolate. The white chocolate was actually not my idea, I saw it in a magazine while sitting in the waiting room at the doctor’s office, but it is a damn good one! The result is a blanket of scented creaminess that is also dense and oh so smooth. And my carrots are boiled in salted water with rosemary, and once cooked, finished with a knob of butter. Simple, familiar, and delicious. All in all, this meal is like a strong, warm hug from that big bear uncle, you know the one. It’s the perfect thing to brighten a bad day, but always welcome no matter the day!

20150303_015419957_iOS

20150303_021015062_iOS

20150331_005928698_iOS

20150331_010741456_iOS

Meatload with Rosemary Mashed Potatoes & Herb-infused Carrots

INGREDIENTS

Meatload Ingredients

  • 454 grams (16oz/1lbs) ground beef
  • 454 grams ((16oz/1lbs) turkey Italian sausage
  • 113 grams (4oz/1/2 cup) Italian bread crumbs
  • 1 egg
  • 1 tablespoon Italian seasoning
  • 2 teaspoons kosher salt
  • 1 teaspoon freshly ground pepper
  • 2 slices of bacon

Rosemary Mashed Potatoes Ingredients

  • 2268 grams (80oz/5lbs)Yukon Gold potatoes, peeled & quartered
  • salt, for boiling potatoes
  • 1 tablespoon rosemary, minced
  • 2 ounces white chocolate, shaved
  • 57 grams (2oz/1/4 cup) of heavy cream
  • 57 grams (2oz/1/4 cup) of butter
  • 1 teaspoon of kosher salt
  • 1 teaspoon of freshly ground pepper

Herb-infused Carrots Ingredients

  • 454 grams (16oz/1lbs) carrots, peeled and cut on diagonal
  • salt, for boiling carrots
  • 1 sprig of rosemary (or 2 of thyme)
  • 1 knob of butter
  • salt & pepper to taste

MISE EN PLACE

  1. Get meats and egg out of fridge. Set out loaf pan. Measure out bread crumbs and seasoning.
  2. Peel and quarter potatoes. Fill stock pot with water. Mince rosemary, shave (or cut) white chocolate. Measure out cream, butter, salt, and pepper.
  3. Fill medium sauce pan with water. Peel and cut carrots. Get out rosemary, butter, salt, and pepper.

STEP ONE
Preheat oven to 350 degrees Fahrenheit. Mix meats, bread crumbs, egg, Italian seasoning, salt, and pepper until combined. Pack into loaf pan, making sure to press firmly removing any air pockets. Place bacon over the top, cutting as necessary. Cook until internal temperature reaches 160 degrees Fahrenheit (approx. 1 to 1 1/2 hours). Allow to rest for 10 minutes (or more).

STEP TWO
When the meatload internal temp is at approximately 130 degrees, bring large stock pot to a boil. Add salt and potatoes. Turn down to a simmer and cook until tender. While waiting for potatoes to cook, in a small sauce pan over low heat, warm cream, butter, white chocolate, rosemary, salt, and pepper. When potatoes are done, drain and rice into large serving bowl. Pour cream mixture that has been strained over riced potatoes and stir. Taste for seasoning.

STEP THREE
Once the potato water is at a boil, turn on the medium sauce pan to bring to a boil. Once there, add salt, carrots, and herb sprig(s). Turn down to cook at a simmer, checking for doneness periodically. Once done, drain, pick out any unwanted herb sprigs, and add butter to melt. Add pepper. Taste for seasoning.

STEP FOUR
Cut meatload into 1/2″ or 1″ slices. On a serving platter, place sliced meatload, potatoes, and carrots. Bring to the table, and tuck in!

20150331_022019480_iOS

Fish Fingers & Mushy Peas

20150319_020415334_iOS

It’s throwback Thursday, and few things remind me of when my girls were young as much as fish sticks, peas, and British children’s shows–all of which were staples in my house. When my first was born, I seriously wanted to move to London, just so that she would have that adorable accent. And we named her Tegan from the original Doctor Who (way before Doctor Who was popular). One of my favorite kiddie shows from across the pond, Charlie and Lola, started each episode with these simply, yet poignant words, “I have this little sister, Lola. She is small and very funny.”

In the episode (and book) I Will Not Ever Never Eat a Tomato.  Charlie goes on to say, “Sometimes Mom and Dad ask me to help give Lola her dinner. This is a hard job because Lola is a very fussy eater.” Charlie then comes up with an ingenious way to cajole Lola into trying—and actually liking—her plate of food.

If you have not heard of Charlie and Lola—a bit of background—the book set–turned delightful TV series–follows a curious four-or-five-year-old, Lola, and her nearly-perfect older brother, Charlie as they make their way in the world. We often times see Charlie explaining the inter-workings of the world to his sissy and teaching her through some clever means.

In this particular episode,, Lola stresses, “I do not eat peas or carrots or potatoes or mushrooms or spaghetti or eggs or sausages. I do not eat cauliflower or cabbage or baked beans or bananas or oranges. And I am not keen on apples or rice or cheese or fish fingers. And I will not ever never eat a tomato.”  Charlie then wiles Lola into eating a meal of fish fingers, peas, carrots, and mashed potatoes by giving each item on the plate colorful names. Mashed potatoes become cloud fluff from the pointiest peak of Mount Fuji. Peas become rare green drops from Greenland. And fish fingers become ocean nibbles for mermaids from under the sea. Bite by bite, Lola submits and tries all the foods. Something definitely worth trying with your own persnickety diners; and I have the perfect meal to try it with: fish fingers and mushy peas.

You will need to rebrand them, of course! Fish fingers and mushy peas sound sort of funny even to the adventurous. So just to get your creative juices flowing, I will give you a few ideas. For the little space traveler, you might call the fish fingers hot Martian trees and the mushy peas glowing alien slime. For your tiny camper, you might refer to them as campfire logs and fairy forest moss. If you want to take it even farther, you could let your little ones play with their food. Maybe you have a wee architect, and could call the fish fingers bricks and the mushy peas mortar and let him build a house, brick by brick. Or, perhaps you have a petite history buff and suggest that she build Stonehenge with craggy old stones atop brilliant emerald grass.

Whatever way you choose to describe your fish fingers and mushy peas, don’t be surprised if you here the following from their oh-so-small mouths in regards to the meal, “You are my favorite, and my best!”, which just happens to be my most cherished quote from Charlie and Lola!

20150319_011230674_iOS

Salmon Fish Fingers

INGREDIENTS

  • 2 salmon fillets
  • tamari sauce, to cover fish
  • 220 grams of pretzels (I use Glutino GF pretzels)
  • 75 grams of ground flax (preferably golden)
  • 1 egg

Mushy Peas

INGREDIENTS

  • 453 grams of petite peas (about 1 frozen bag)
  • knob of butter
  • 1 tablespoon of minced fresh dill
  • 1 tablespoon of minced fresh tarragon
  • 1 tablespoon minced fresh mint
  • 3 green onions, white and green, sliced thinly
  • salt and pepper to taste

Optional Dipping Sauce

  • tamari sauce
  • 1 green onion, sliced thinly
  • hot oil

MISE EN PLACE

  1. Preheat oven to 350 degrees.
  2. Cut salmon fillets into 1″ strips, put in shallow pan, and cover with tamari.
  3. Blitz pretzels and flax in food processor and put in shallow bowl.
  4. Get peas out.
  5. Mince dill, tarragon, and mint.
  6. Slice green onion.
  7. Whisk one egg.
  8. Make sure salt and pepper are within reach.

STEP ONE
Remove salmon sticks from tamari. Pat semi-dry. Drop sticks in egg, and then pretzel mixture. Lightly shake off excess crumb and place on cookie sheet. Pop in oven for about 15 minutes, turning half way through.

STEP TWO
Cook peas, either on stove top or in microwave oven. Once done, put in the same food processor that was used for pretzel crumbs (assuming you already took the pretzel mixture out). Add herbs and green onion. Pulse to break down. Taste; adding salt and pepper as needed. Pulse again, but should be slightly chunky still.

COOK’S NOTES
The fish fingers should be tender and flaky with a slightly sweet and salty crust from the pretzels. The mushy peas with be bursting with flavor and sweetness. Adults version may want to have a separate dipping sauce. A quick solution; simply pour a bit of tamari in a small bowl and add a few green onions and some hot oil. Or, if you are a kid–or kid at heart–simply use the mushy peas as your dip for the fish fingers; as I do!

Serves four.

20150319_020333406_iOS

That’s a Wrap!

20150331_210722578_iOS

Nothing against a turkey wrap, but my favorite type of wrap is a lettuce wrap. I always feel like I am eating so healthy when I order it in the Asian bistro (you know the one). After looking online at the stats, it turns out that while I feel I am eating well, that may not be entirely the case: one serving has 530 calories, 24 grams of fat, 2090 milligrams of sodium. On the bright side, it does have only 47 grams of carbohydrates, 8 grams of dietary fiber, and a whooping 32 grams of protein. It is not the worst meal you could have, but definitely not as health conscious as I once thought. It got me to thinking; how healthy are the baby bok choy wraps that I make at home? It turns out that they are a bit better for you than the restaurant version in that they have a bit less in the way of calories totaling 423,  one more gram of fat with 25 grams, almost half the sodium with only 1157 milligrams of sodium. The carbs come in with less than half at 21 grams but only 4 grams of dietary fiber, and the protein is reduced by 3 grams to 29 grams.

20150331_210740666_iOS

So depending on the focus in your diet, you might choose either. What I really like about a homemade filling though is that it can be customized to your individual taste. I happen to think the filling I get at the Asian bistro is a bit on the sweet side, so my concoction is not so sweet but the umami is bumped up a bit–just the way I like it! In addition, I can source my own products which for me means using as much organic and fresh products as possible. In the recipe below, I believe the only item I could not find organic was the pepper and water chestnuts. Not bad, in the grand scheme of things. While the benefits above may be enough to convince you, there is one more thing that puts it over the top: how completely simple they are to prepare! Just take a look…

20150331_013137913_iOS

Baby Bok Choy Wraps

INGREDIENTS

  • 2 slices of bacon, diced small
  • 1 tablespoon of garlic, minced
  • 1 tablespoon of ginger, minced
  • 377 grams (13.3oz) of ground chicken
  • salt & pepper to taste
  • 1 shallot, minced
  • 10 cremini mushrooms, minced
  • 1 can of sliced water chestnuts, minced
  • 2 small carrots, minced
  • knob of ghee
  • 1 teaspoon roasted sesame oil
  • 1/2 teaspoon hot oil
  • 1 tablespoon oyster sauce
  • salt & pepper to taste (again)
  • 2 bunches of baby bok choy (or lettuce cups)

MISE EN PLACE

  1. Dice the bacon.
  2. Mince the shallot, mushrooms, water chestnuts, and carrots.
  3. Make sure the salt, pepper, sesame oil, hot oil, and oyster sauce are within reach.
  4. Wash and trim off ends of baby bok choy.

STEP ONE
Cook diced bacon until almost crisp over medium heat in a large fry pan. Add garlic and ginger. Cook until tender. Remove from pan with slotted spoon; leaving bacon drippings.

STEP TWO
Cook ground chicken over medium heat, breaking up into small pieces. Season with salt and pepper. Once cooked through, re-add bacon mixture and cook for a minute or two. Remove from pan with slotted spoon.

STEP THREE
To the same large fry pan, add ghee, sesame oil, and hot oil along with shallot, mushrooms, water chestnuts, and carrots. Add a pinch of salt and pepper. Cook until tender; about two minutes. Re-add chicken/bacon mixture. Stir. Add oyster sauce. Stir to integrate. Taste for seasoning; adding salt and pepper if necessary.

STEP FOUR
Spoon chicken mixture onto scoop portion of baby bok choy and serve!

COOK’S NOTES
Alternatively, you could use the baby bok choy as little dippers and forgo plates! Or if you really want, you could use lettuce cups~

20150331_211023080_iOS

Curry in a Hurry!

20150325_023939394_iOS

For the most part, I love cooking. But there are some days when I just want to kick my feet up, sip a hearty glass of wine, and enjoy the moment. Today was one of those days. But just because I was not in the mood to spend too much time in the kitchen did not mean that I did not want a robust dinner to match that full-flavored glass of vino.

One of my favorite no-fuss meals requires just a smidge of prep and then it is only a matter of sitting back patiently to reap the flavorful results. The funny thing about this recipe though it that it was the result of a fluke mishap in grocery shopping, or lack there of. I had forgotten to get some chicken to add to a basic Japanese curry and had no desire to venture out to get the missing ingredient as night was falling. My lovely daughter had told me at some point previously that she had started putting chickpeas (garbanzo beans) in her curry instead of potatoes and I always have a can or two on hand so I thought that might be a good protein replacement, but I still needed some bulk beyond the sweet carrots and tender onions. I took a look in the fridge to see what I might be able to steal from another planned meal later in the week (I am a fan of putting off today what I can do tomorrow; at least when it comes to grocery shopping). The cauliflower was yearning to be used and, if I am not mistaken, winked at me. And with that, a star was born–or at least a stellar meal!

20150325_014442307_iOS

20150325_020030967_iOS

20150325_014454898_iOS

Cauliflower Curry in a Hurry

INGREDIENTS

FOR RICE

  • 1 cup of basmati rice
  • 1 teaspoon sea salt
  • 1 teaspoon ghee
  • 1 1/2 cups of water

FOR SAUCE

  • 1 large organic sweet onion, minced
  • 2 tablespoons ghee
  • 1 29oz-can of garbanzo beans/chickpeas, drained
  • 1 small head of cauliflower, cut in florets
  • 6 medium carrots, peeled & cut in 1″ pieces
  • 1 3.5oz-packet of golden curry sauce mix, broken in pieces
  • 2 1/2 cups of water
  • salt & pepper, to taste
  • fresh herbs, if desired
  • crispy onions, if desired

MISE EN PLACE

  1. Measure out rice, salt, ghee, and water for rice.
  2. Mince onion, drain chickpeas, cut cauliflower, peel and cut carrots, and mince herbs (if using)
  3. Break up curry block and measure out water for curry.
  4. Make sure ghee, salt, and pepper are within reach.

STEP ONE
To make this foolproof rice and quick and easy curry that is protein packed and loaded with fresh veggies, start by preheating the oven to 350 degrees. Once preheated, bring water for rice to a boil in a medium ovenproof sauce pan. Stir in rice, butter, salt and water. Cover and return to a boil. Put rice in oven and set timer for 15 minutes. Once done, remove from oven and let rest for 5 to 10 minutes (until sauce is done). Fluff.

STEP TWO
While the rice is cooking, in a large sauce pan over medium heat, melt ghee. Add minced onion, cooking until tender and slightly golden (approx. 5 mins). Add cauliflower florets and 1″ carrot pieces. Cook for 5 minutes. Add water and bring to a boil. Add golden curry pieces. Stir to dissolve. Add chickpeas and stir. Lower heat to a simmer, cover, and cook until veg is tender (approx. 10 mins), stirring occasionally. Ladle sauce over prepared rice, and some fresh herb and crispy onion, and serve!

Makes four generous servings.

As you can see from the lack of steps, this curry in a hurry is not only quick, it is easy! But don’t let that make you think it might be lackluster. By using the golden curry sauce mix, the flavor is anything but boring. Personally, I like the hot golden curry sauce mix, but there is also mild and medium hot, and extra hot available. You can normally find it at your local grocery store in the ethnic/international aisle, but if not, you can also purchase through Amazon.com via the links above. And yes, I get a few pennies for your purchase, but whether you buy at your store or online, the most important thing is that you try it. The combination of ingredients marries so well in the curry. Because the curry cooks so quickly, there are no muddled flavors or textures. The carrots are sweet and chunky, the onion slightly caramelized and soft, the chickpeas have a slight chew, and the cauliflower is toothsome yet mellowed from its raw state. And when you pour this spicy mixture over fluffy, tender rice, everything visually pops–all your senses are engaged. As I sit here sipping the last few drops of my wine, I can’t help but wonder when the stars will align, and we–the cauliflower curry and I, that is–will meet again.

20150325_023917366_iOS

A Little Sugar & a Lot of Spice

20150318_023751164_iOS

It’s late March here in the Northwest and the weather is anything but predictable. One day, the clouds amass in a blanket of grey and the next they are pillowy white racing through a Capri-hued backdrop. And if that were not enough, there are plenty of days that provide both. But one thing you can count on is a crispness to the air that makes you feel alive. After a winter of hibernating, it’s a welcome notion to get outside, take a deep breath, and stick your hands in some dirt.

After a few hours of tending to the garden, it’s time to come in for some tea and sweet tid bits. I can think of nothing better than a moist, flavorful cake with a kick of warmth to tickle the senses, and to me that means gingerbread cake–at least the dark, spicy gingerbread I make. The complexity of flavor defies the ease of which this staple nosh is made. So, I am off to the kitchen to whip some up.

20150317_233405707_iOS
Gingerbread with a Kick

INGREDIENTS

Dry Ingredients

  • 220 grams of all-purpose flour (or whole-wheat pastry flour)
  • 1 tsp of ground ginger
  • 1/2 tsp of ground cinnamon
  • 1/2 tsp of ground clove
  • 1/2 tsp of ground allspice
  • 1/2 tsp of freshly grated nutmeg
  • 1/4 tsp of freshly ground black pepper
  • 1 tsp of salt
  • 1/2 tsp of baking soda
  • 1/2 tsp of baking powder

Wet Ingredients

  • 115 grams of brown sugar, add a tad more if you like it sweeter
  • 175 grams of molasses, I prefer dark but use what you like
  • 113 grams of butter, melted & slightly cooled
  • 1 egg, room temp
  • 1 Tbsp vanilla
  • 1/2 cup of water

Prep & Other Ingredients

  • powdered sugar
  • butter
  • 1/2 cup whipping cream
  • maple syrup, to taste

MISE EN PLACE

  1. Preheat oven to 350 degrees.
  2. Grease and dust 8″x8″ square pan using butter and powdered sugar.
  3. Get egg out so it gets to room temperature.
  4. Melt butter, grind pepper, and grate nutmeg. If you grate too much, no worries. Set aside and use as garnish.
  5. Measure out all other ingredients.

STEP ONE
In a medium-sized bowl, whisk all dry ingredients. In a large bowl, mix all wet ingredients; stirring until smooth.

STEP TWO
Combine wet and dry ingredients until incorporated. Pour into prepared pan and cook for approximately 30 minutes (until toothpick comes out clean). Let cool for at least 15 minutes.

STEP THREE
While gingerbread is cooling, prepare cream by whipping until slightly stiff. Add a bit of maple syrup to your liking. Cut into 9 or 16 pieces and serve each with a dollop of cream and any extra grated nutmeg.

COOK’S NOTES
If made right, you should now be enjoying a stunningly dark, moist slice of cake that pairs well with whipped cream, ice cream, or all by its lonesome.

20150318_023837975_iOS

Two heads are better than one…

20150321_002200517_iOS
especially when they are both cabbage heads!
That’s right, cabbage. This humble vegetable has gotten a bad rap, much like the Brussels sprout–maybe it is guilt-by-association. But regardless, the “act of boiling” is the guilty party–not the veg!

It was not that long ago that I made colcannon, which included a fair amount of cabbage, to serve with my husband’s homemade corned beef. While possibly not the healthiest side–for a moment–I believed that I could eat this concoction every day, for the rest of my life, and never tire of it. But logic kicked in and said, “That may be the case, but at some point, your expanding waist would become an actual tire.” Probably so, but it was a nice, all-be-it fleeting inter-dialogue.

But, back to the cabbage; sort of. Several years ago, I periodically frequented a restaurant that had iceberg lettuce wedges on its menu. I thought this insane. Personally, I can not image paying for this. Full disclosure: I do not use salad dressing so if the secret to this menu item’s success is in its accouterments; I apologize. But for me, this just seems like throwing money away. What I am trying to get to is that while this seemed a rather odd idea–the lettuce wedge that is–the idea of a cabbage wedge, does not. Why, you ask? Because…it is no longer a cold water-logged slice of salad slapped on a plate. It is a braised piece of cabbage that is seared on the stovetop, seasoned to perfection, and cooked until tender.

Strangely enough, this post is not about the cabbage wedge I just so lovely spoke of, but rather its brother: the cabbage steak. The reason being, if you recall, I used (and I quote) “a fair amount of cabbage” in my colcannon, but it turned out, not all of it. I was left with two center strips a little over an inch in height; each about the size of a hearty steak.

When I braise my cabbage, I normally add fennel seeds, pancetta, and sherry to the mix and the result is perfect balance of flavors and tasty broth to sop up with crusty bread or pour over creamy German butterball potatoes. I do not happen to have any artisan bread or potatoes on hand today, however I do have some some thinly sliced pork cutlets and the feeling that I can produce a similar flavor profile. And that is where our recipe finally begins…

20150321_002045215_iOS

Fennel-crusted Pork

INGREDIENTS

  • 4 thinly-sliced pork cutlets
  • fennel seeds to coat both sides of cutlets
  • salt and pepper to taste
  • oil to coat the fry pan

Cabbage Steaks

INGREDIENTS

  • 2 center sections of leftover savoy cabbage
  • knob of butter and olive oil
  • 1 Tbsp of fennel seeds
  • salt and pepper to taste
  • a few splashed of sherry
  • chicken stock
  • 1 tsp of tarragon, minced

MISE EN PLACE

  1. Allow pork to get to room temp.
  2. Preheat oven to 400 degrees.
  3. Salt, pepper, and fennel crust pork, and set aside.
  4. Make sure salt, pepper, fennel seeds, oil, sherry, and chick stock are within reach.
  5. Take cabbage out of fridge.

STEP ONE
Over medium heat, add a knob of butter and a bit of oil to oven-proof fry pan. Once melted, add cabbage. Sprinkle with salt and pepper. Once golden brown, on lower side, turn and brown on other side, taking care to salt and pepper top side. Remove from pan and set aside.

STEP TWO
In the same pan, add oil and then port cutlets. Cook over medium heat until browned, approximately 2 minutes. Turn and cook other side until browned, approximately 2 minutes. Remove from pan, tent, and rest.

STEP THREE
Deglaze the same pan with a few splashes of sherry, scraping bits of goodness from the bottom. Add cabbage back in, add chicken stock to cover half way up the cabbage. Sprinkle fennel seeds over cabbage and into surrounding stock. Pop in the oven and cook until tender. Remove from oven, plate with pork, and garnish with tarragon and a wee bit of the pan drippings.

COOK’S NOTES
If making again in the future, I would do a quick brine on the pork as the cutlets are so thin, they can easily dry out when cooking. Letting them get to room temp also aids keeping the meat moist as the meat does not have to heat up before starting to actually cook. And if you have any leftovers from this meal–chopped up–they make a savory addition to a breakfast scramble.

20150321_184013470_iOS

On the Frittata Fence?

pintrest
I know how you feel! Frittatas were never my thing. In fact, until recently, I had never even made one at home. If you don’t believe me, you can read more about my egg adventures by clicking here. But that has all changed. I have broadened my horizons, and become a frittata lover. And not just because they taste so good. They also happen to be a perfect meal-on-the-cheap. And while their main gig is brunch, they can stand in for breakfast, lunch, or dinner!

2

Yes, the humble frittata is extremely versatile–even in what you pair with it. You see, frittatas are the Garanimals of the food world. For every five or six eggs in your frittata, you simply mix and match about one cup of fillings and a handful of grated cheese–all based on your taste and what’s available in the fridge. Leftovers and eggs make for a really inexpensive culinary adventure. Every time I think I have found my favorite, I am surprised by a new combination and gobble it up with the excitement of a 1-year-old eating cake for the first time. I am not normally a second helping type of girl–just ask my husbandbut I now break that rule for frittatas (and Indian food, if I am being completely truthful)!

My favorite combo had been smoked ham with sautéed leeks and smoked Gruyere. But then a few days ago, I made warm bacon, fennel, and Brussels sprouts over tagliatelle pasta with chicken liver alfredo sauce, which had leftover braised fennel and Brussels sprouts. I knew immediately that these veggies would play well with pancetta and, of course, smoked Gruyere. As luck would have it, our girls egg production has increased with the longer days, so six eggs was a drop in the basket.

Putting this light supper together was a snap. I simply cracked and whisked the eggs, added the accouterments, poured into a buttered fry pan, cooked over low heat until slightly giggly, and then popped in the oven until set. In the off chance you would like a more formal recipe, here it is:

Pancetta, Fennel, & Brussels Sprouts Frittata

INGREDIENTS

  • 5 or 6 free range eggs (depending on the size provided by your egg source)
  • 113 grams (4oz) of pancetta, precooked and crumbled
  • 1/2 cup (by volume) braised fennel & Brussels sprouts
  • 1/2 cup (by volume) of grated smoked Gruyere
  • salt & pepper to taste
  • knob of butter

MISE EN PLACE

  1. Preheat oven to 350 degrees.
  2. Get leftover veg braise out to bring to room temp.
  3. Cook pancetta.
  4. Crack and whisk eggs.
  5. Grate cheese.
  6. Get out butter, and make sure salt and pepper are within reach.

STEP ONE
Heat 8″ non-stick fry pan over low to medium-low heat. Add butter. Once butter is melted, add veg to reheat.

STEP TWO
Add whisked eggs, most of the meat and cheese, salt, and pepper. Slowly cook the mixture; gently but constantly stirring, making sure to scrap sides of pan as you go. Continue to stir until slightly giggly.

STEP THREE
Once slightly giggly, pop in oven until just set; approximately 5 minutes, but it really dependents on your oven and how well done you like your eggs. Do keep in mind that they will continue to cook from residual heat after being removed from the oven.

STEP FOUR
Allow to cool for at least 10 minutes. At that point, you can run a spatula around the side of the pan and slip the frittata on to a cutting board to cut/portion. To serve, sprinkle a bit of the leftover pancetta and grated cheese on top of each slice.

Cook’s Notes
The addition of crusty grilled bread would be a nice complement at breakfast, while the grilled bread and a green salad would be satisfying lunch or dinner. I would also recommend that you try cooking for slightly less time than you think is appropriate. When the eggs are cooked to perfection, they are creamy; without being runny. But if you take the frittata out of the oven too late, the texture will become rubbery and lack the rich, velvety texture that makes this meal stand out.

Makes 4 servings.

4